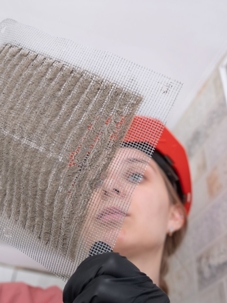
Beginner’s Guide: How to Clean Your AC Coils and Boost Efficiency
Routine maintenance is key to keeping your air conditioner running efficiently, and one of the most important tasks is cleaning the coils. Over time, dust, dirt, and debris build up on the coils, reducing performance, increasing energy use, and even leading to breakdowns. The good news? Cleaning your AC coils is easier than you might think.
In this guide, we’ll walk you through everything you need to know to safely and effectively clean your AC coils—even if you're a first-timer.
Why Cleaning AC Coils Is So Important
Your air conditioning system has two sets of coils:
Evaporator coils (inside your home)
Condenser coils (outside the home)
These coils are essential for transferring heat, which allows your system to cool your home efficiently. When they get dirty, heat transfer becomes less effective, forcing your system to work harder and use more energy.
Benefits of Cleaning AC Coils:
Improved energy efficiency
Reduced wear and tear on the system
Lower risk of breakdowns and costly repairs
Extended system lifespan
Consistent cooling performance
What You’ll Need
Before you get started, gather the following tools and supplies:
Screwdriver or wrench (to access the coils)
Soft brush or coil cleaning brush
Fin comb (optional, for straightening bent fins)
Spray bottle
Mild detergent or commercial coil cleaner
Garden hose (for outdoor coils)
Gloves and safety goggles (for protection)
Step-by-Step: How to Clean Your AC Coils
Step 1: Turn Off the Power
Always prioritize safety. Shut off power to the AC unit at both the thermostat and the circuit breaker to avoid any risk of electric shock.
Step 2: Access the Coils
Evaporator Coils (Indoor): Open the indoor unit’s access panel. You may need a screwdriver or wrench. Refer to your unit’s manual if needed.
Condenser Coils (Outdoor): Remove the top grille or side panels to access the coils.
Step 3: Remove Loose Debris
Use a soft brush to gently sweep away dirt, dust, and debris. Avoid bending the coil fins.
Step 4: Apply Coil Cleaner
Indoor Coils: Spray a mix of mild detergent and water directly onto the coils. Let it sit for 5–10 minutes.
Outdoor Coils: Use the same solution or a commercial coil cleaner, following the manufacturer’s instructions.
Step 5: Rinse the Coils
Indoor Coils: Wipe with a damp cloth to remove loosened debris. Avoid over-saturating the coils.
Outdoor Coils: Rinse thoroughly with a garden hose. Use low water pressure to avoid damaging the fins.
Step 6: Straighten Bent Fins (Optional)
If you notice bent fins, gently straighten them using a fin comb. This improves airflow and overall efficiency.
Step 7: Reassemble and Test
After the coils are clean and dry, reassemble any panels or covers. Turn the power back on and run the system to make sure it’s functioning properly.
How Often Should You Clean AC Coils?
Evaporator Coils: At least once per year
Condenser Coils: Every 6 months, or more frequently if the outdoor unit is exposed to leaves, dust, or debris
When to Call a Professional
While DIY cleaning works in most cases, some situations call for an HVAC technician:
Coils show signs of extensive damage or corrosion
You’re still experiencing cooling problems after cleaning
You don’t have the tools or time to do it properly
A professional can provide a deep clean, inspect for damage, and ensure your system is running at peak performance.
Keep Your System Running Smoothly
Cleaning your AC coils may not be the most glamorous job, but it’s one of the most effective ways to keep your system efficient, avoid costly repairs, and stay comfortable all year long.
A little maintenance goes a long way—happy cleaning!

